Buying and checking a vintage tube amplifier
The worst thing you can do with a tube amplifier that has sat in a basement since 1974 is the first thing almost everyone does: plug it in and turn it on to see if it works. Sometimes it does, for a minute. Then a filter capacitor that dried out decades ago shorts, the rectifier tube flashes blue, and a power transformer that would have been fine forever starts to smell. A replacement transformer for a classic American amplifier can cost more than the amplifier did.
So this guide starts with a rule and then works backwards to the shopping.
The rule: never apply full mains voltage to an unknown amplifier
Bring the voltage up slowly. There are two common ways.
A variac (variable autotransformer) lets you start at a fraction of mains voltage and raise it over twenty or thirty minutes while you watch a current meter. If the current climbs steeply at low voltage, something is shorted; stop. Many old electrolytic capacitors will partly "re-form" when brought up gently. That is not a permanent repair, but it can let you test the rest of the amplifier.
A dim-bulb tester is the cheap alternative: an ordinary incandescent lamp wired in series with the amplifier's mains lead. If the amplifier draws heavy current because of a short, the bulb lights brightly and takes most of the voltage, protecting the transformer. If the amplifier is healthy, the bulb glows briefly as the filaments warm, then dims. A 60 to 100 watt bulb suits most mid-size hi-fi amplifiers.
If you are buying in person and the seller insists on a demonstration, ask how long it has been since the amplifier last ran. "It was working when it went into storage" is not an answer.
What to look at before you pay
The transformers. These are the expensive, hard-to-replace parts. Check that the output transformers and power transformer are original to the model (compare with photographs of known examples, such as the ones on the model pages in this archive). Look for tar or wax that has leaked out of the cans, a sign of serious overheating. Swollen or cracked cases are worse. Measure the windings with an ohmmeter if the seller allows it: an open primary on an output transformer means the channel is dead until you find another transformer.
The chassis. Surface rust on the top plate is cosmetic. Rust that has eaten through around the tube sockets, or water stains under the chassis, suggest damp storage, and damp kills transformers and paper capacitors slowly.
Under the bottom plate. If you can remove it, look. A neat original layout with period components is valuable for a collector; it shows the amplifier has not been butchered. A tidy recap with modern capacitors is fine for a listener. Burnt resistors, melted wire insulation and blobs of solder bridging terminals are bad signs. So are "improvements" by a previous owner that nobody documented.
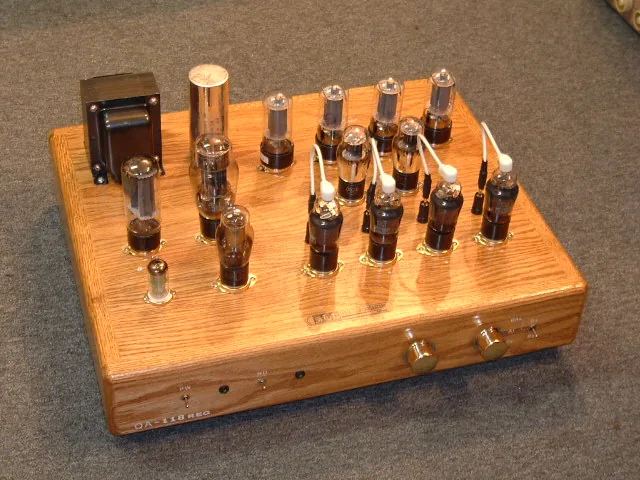
The tubes. Matching brands and date codes across output tubes suggest originals or a careful re-tube; a random mix suggests someone replaced failures one at a time. Original tubes from respected makers have value of their own: the archive has listings that made a point of Mullard and Telefunken tubes for that reason. Read the tube tester guide before trusting any test results a seller shows you.
The controls. Rotate every knob and flip every switch, power off. Scratchy pots and dirty switches are normal and usually clean up with contact cleaner. Seized or broken shafts are not, and original knobs for some models are harder to find than the amplifier.
The paperwork. An original manual, schematic or factory-wired certificate adds real value. So does a record of what work has been done and when.
What a sensible restoration involves
For an amplifier you intend to use, budget for the following, roughly in this order:
- Replace all electrolytic filter and cathode bypass capacitors. They are the most likely cause of hum and the most likely parts to fail dangerously.
- Replace paper and wax coupling capacitors, the ones between stages. Leaky coupling caps pass DC to the grids of the output tubes, which upsets the bias and can run the tubes into red-plating (the plates glowing visibly red) and early death.
- Check carbon composition resistors. They drift upwards in value with age; a 20% drift on a plate load resistor changes the operating point.
- On fixed-bias amplifiers, rebuild the bias supply and set the bias with a meter after fitting new output tubes. Many original manuals give the target current or voltage.
- Replace a two-wire mains cord with a properly fused three-wire cord. Remove any "death cap" (a capacitor from one side of the mains to the chassis) found on some old designs.
- Clean switches, controls and tube sockets.
For a collector-grade piece, the calculation changes. Some buyers pay more for untouched originals and accept the restoration risk themselves. If you restore one, keep the removed parts in a labelled bag with the amplifier; it helps the next owner understand what was done.
Write it down as well. A one-page restoration record is worth more to the next owner than any seller's "fully serviced": what you replaced, the voltages you measured before and after, the bias setting, and the date. Set it out like a plain business report, with what was found, what was done and what still needs attention in that order, and numbers instead of adjectives.
Common faults by type
| Symptom | Usual cause | First check |
|---|---|---|
| Loud hum, steady, both channels | Dried filter capacitors | Main filter cans in the power supply |
| One channel weak or distorted | Phase splitter tube, leaky coupling cap, failing output tube | Swap the small tubes left to right and see if the fault moves |
| Output tube plates glow red | Bias failure or leaky coupling cap | Switch off at once; measure bias voltage on the grids |
| Crackle when touched or tapped | Dirty sockets, cracked solder joints | Tap each tube gently with a pencil while listening |
| Fuse blows at switch-on | Shorted rectifier or filter capacitor | Do not keep replacing fuses; find the short |
| Scratchy volume control | Dust and oxidation | Contact cleaner, exercised through full rotation |
Prices and patience
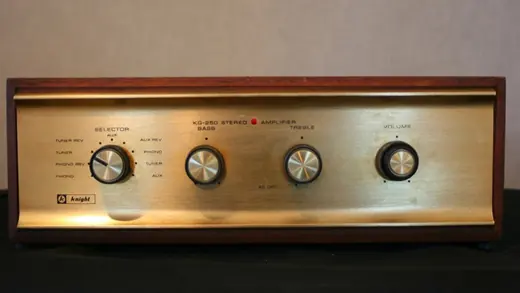
This archive is not a shop, and prices change too much to quote. A few patterns hold. Famous names (Marantz, McIntosh, early Western Electric) carry a premium that has little to do with how they sound. Kit amplifiers from Dynaco, EICO, Heathkit and Knight are often very good and much cheaper, but the quality depends on the person who held the soldering iron in 1962; inspect the joints. Professional and public-address amplifiers from Bogen, Altec and similar makers can be bargains for listeners because collectors overlook them, and the archive's manufacturer pages will tell you which lines were designed for hi-fi and which for school halls.
Above all, buy the amplifier for the transformers and the chassis, not for the tubes or the capacitors. Tubes and capacitors are consumables. Iron is forever, until somebody switches it on cold.
Tube amplifiers hold lethal voltages, sometimes for days after being switched off. If you are not trained to work on high-voltage equipment, leave the inside to someone who is.
Short answers
Is it safe to plug in a tube amplifier that has been stored for decades?
Not straight from the wall. Bring the voltage up slowly with a variac, or use a dim-bulb tester, so that a shorted capacitor or rectifier cannot damage the power transformer. Better still, have the capacitors checked first.
Which parts of an old amplifier are hardest to replace?
The transformers, especially the output transformers. Tubes, capacitors and resistors are consumables. An amplifier with damaged or non-original transformers is worth much less.
Should I buy an untouched original or a recapped amplifier?
If you want to listen to it, a neatly recapped amplifier with documented work is the safer buy. Some collectors pay more for untouched units and accept the restoration risk; if you choose that route, budget for a full capacitor replacement.
Are kit-built amplifiers worth buying?
Often, yes. Dynaco, EICO, Heathkit and Knight kits used sound designs, and parts and manuals are easy to find. Their quality depends on the original builder, so inspect the solder joints and wiring before buying.
Checked against: Wikipedia: Tube tester · Wikipedia: Single-ended triode